CoCoNet - User Guide

CoCoNet is a tool for the visualization, construction and conversion of neural network models.
CoCoNet supports ONNX and pyTorch formats using the operators in the VNN-LIB standard.
This guide shows how to install, setup and use CoCoNet for the exchange of neural network models.

Installation

CoCoNet can be executed on any system running Python >= 3.9
The instructions below have been tested on Windows, Ubuntu Linux, Mac OS x86 and ARM-based Mac OS.

  • Linux, Mac OS x86 and Windows

  • The packages required in order to run CoCoNet are the pyNeVer API and the PyQt6 framework, which can be installed via PIP
    pip install pynever PyQt6
    After the installation, you can run CoCoNet from the root directory
    python CoCoNet/coconet.py

  • ARM-based Mac OS

  • Since the Python packages needed are incompatible with "Python for ARM Platform" you can install miniforge for arm64 (Apple Silicon) and create a x86 Python virtual environment.
    Create a new environment using Python 3.9.5 and activate it
    $ conda create -n myenv python=3.9.5
    $ conda activate myenv

    You can now run PIP for installing the libraries and run CoCoNet
    $ pip install pynever PyQt6
    $ python CoCoNet/coconet.py

    Note that each time you want to run CoCoNet you'll need to activate the Conda environment.

CoCoNet is a GUI for constructing and converting Neural Networks, but it also provides a simple CLI usage for checking whether a NN is compliant with VNN-LIB and quick-converting networks in the ONNX format.
Typing
python CoCoNet/coconet.py -h
shows the possible command-line instructions available.

Build a network

Run CoCoNet


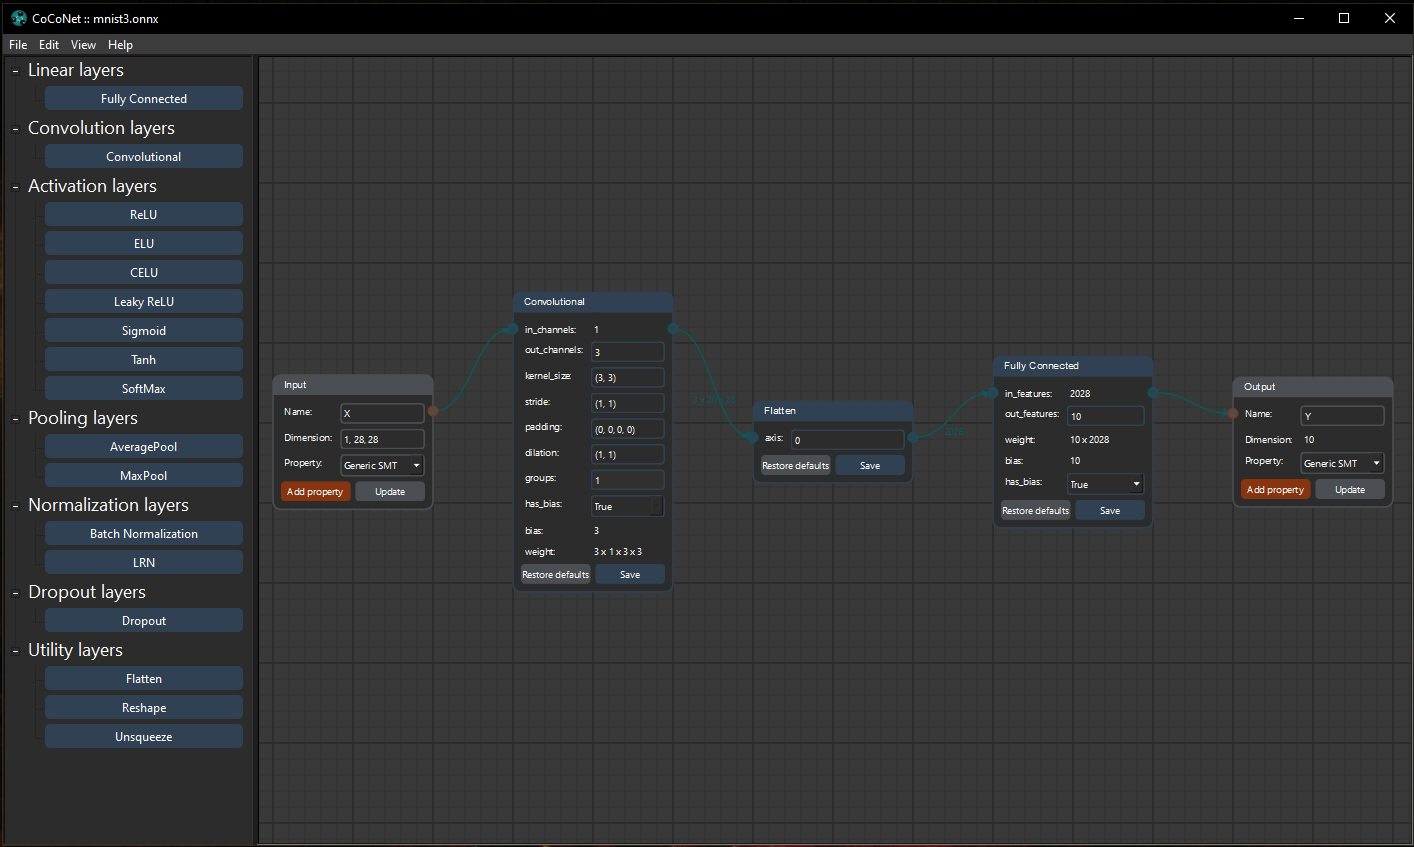
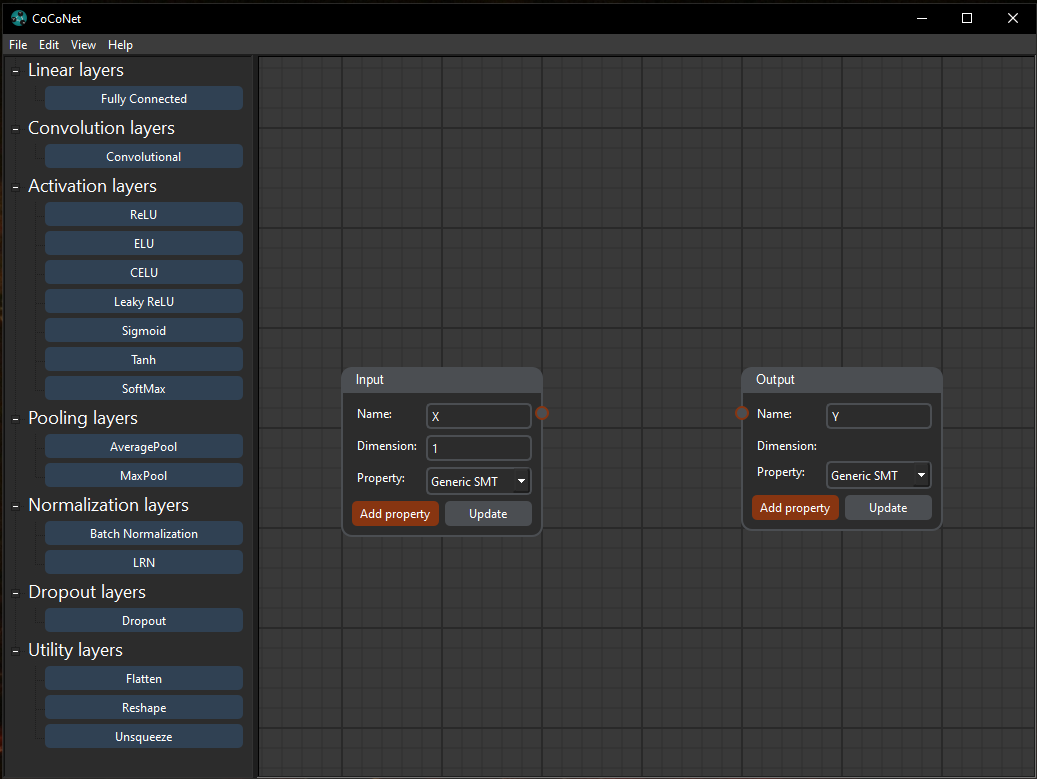
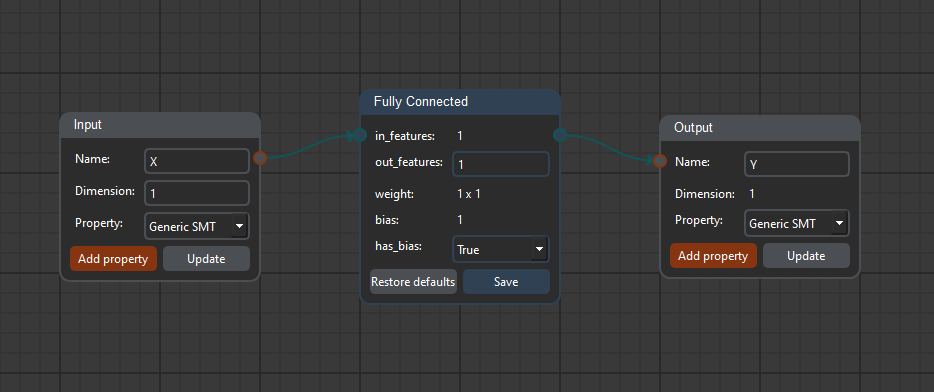
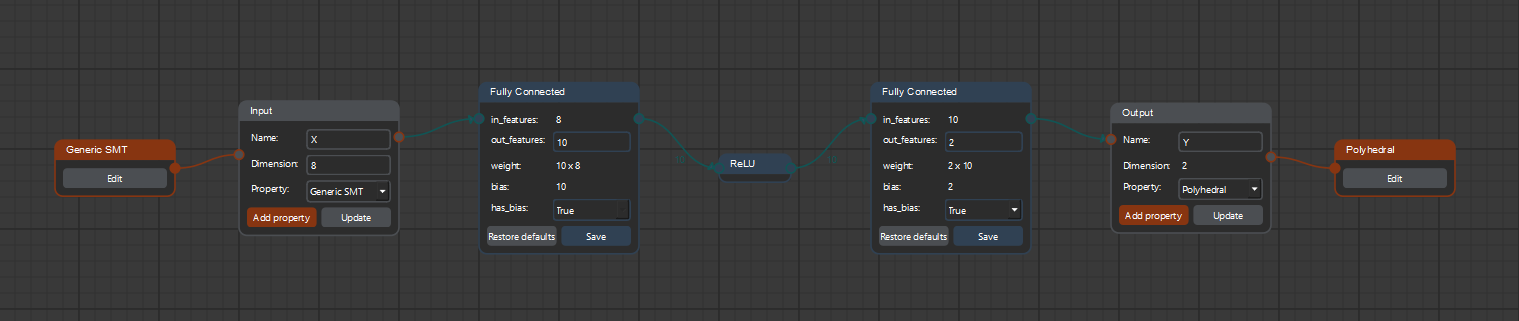
Upon running CoCoNet, there are always two blocks for defining the input and the output of the network:
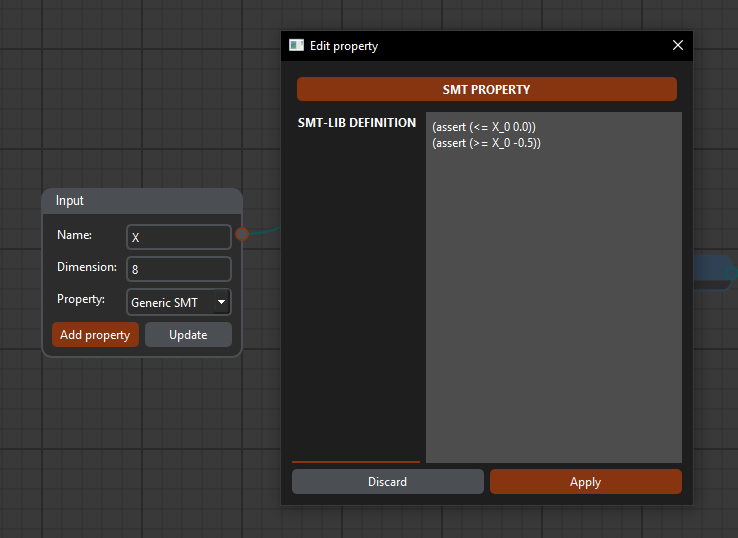
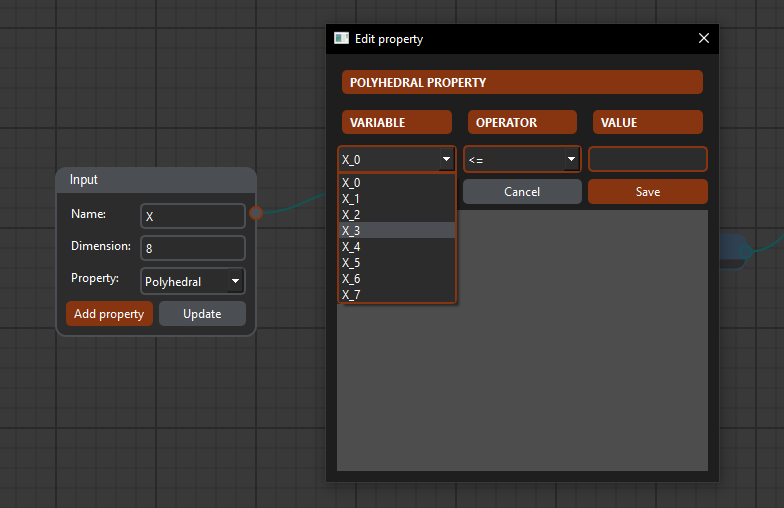
  • The Input block is used to set the input identifier and the expected input dimension of the network, while the Output block is used only to set the output identifier; the output dimension will be displayed as it is computed by the layers
  • The Name field is of type string
  • The Dimension field is either a single digit - for single-dimensional inputs - or a list of comma-separated values - for multi-dimensional inputs
  • The Property box is used to select the property to add to the network

Add layers


The left toolbar displays the available layers for building a network. Clicking on a layer button automatically adds a new layer to the network with default parameters. When a block is displayed, it is possible to update the parameters only if it is the last layer of the network in order to guarantee the consistency: for this reason, layers should be added and their parameters defined before continuing. Only when the Save button is pressed the layer parameters are updated.
Clicking the Restore defaults button will reset the default values of the layer but will not update the network until Save is pressed again.

Delete network and layers


It is possible to delete single and multiple blocks using the Delete key, but only if they are at the end of the network. In order to keep consistency, trying to delete a layer between others will prompt the user to delete all the subsequent layers.
For clearing the workspace and deleting the whole network, it is possible to use the corresponding menu voice in the Edit tab or with the Ctrl+Shift+C keyboard shortcut.

Define properties

Property templates


It is possible to define VNN-LIB properties on the network by using the corresponding button on the input or output blocks. The combo-box allows to choose between the following:
  • A Generic SMT property, that is used to write in plain SMT-LIB
  • A Polyhedral property, that provides a controlled environment for bounding input or output variables
  • A Box property, that provides a way to define all the lower and upper bounds for the variables
  • A Classification property, only for the output node, that provides a way to specifying whether an output variable should be minimized or maximized
Each property opens a dialog to define and validate the property. The Generic SMT property dialog is simply a text area to write on.
The Polyhedral property dialog shows a selector for the variables, filled with the corresponding input or output values, a selector for the relational operator and a field for providing a bounding value.

Property blocks


When the properties are defined, a corresponding block is displayed, attached to the input or output block. The Edit button allows to modify the content of the property, while to change the property type it is required to select a new property from the output block combo box.